Using the CLOUDflex instance manager
The CloudFlex Instance Manager lets you manage your virtual machines in the cloud — viewing their state, controlling power actions, and connecting directly using the DCV web client or native DCV client.
Overview of the Instance Manager
Section titled “Overview of the Instance Manager”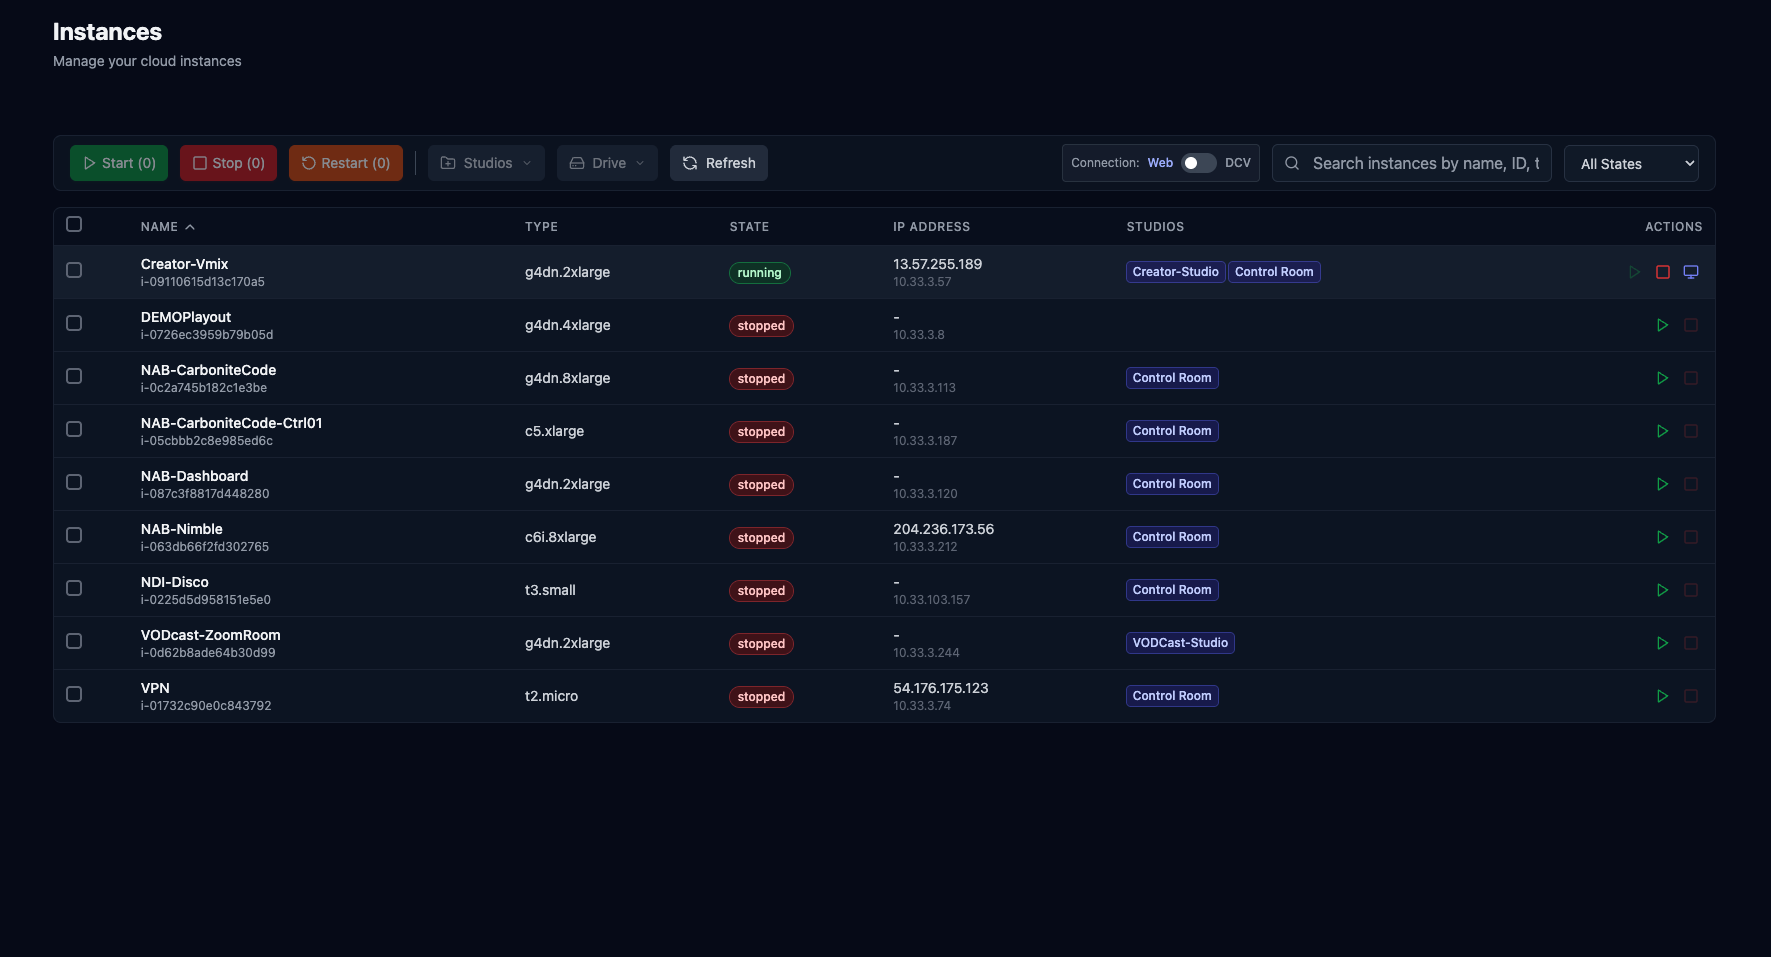
The dashboard lists all instances available to your account — these are your virtual production machines in the cloud.
Each entry displays key information:
- Machine Name
- State – e.g.,
running,stopped,pending, orlaunching - Public IP Address – visible in bold, accessible externally
- Private IP Address – only accessible within your cloud network
- Assigned Studio – a logical group of related instances (similar to a team or project)
Understanding Studios and User Access
Section titled “Understanding Studios and User Access”Studios are logical collections of instances that can be assigned to specific users or groups.
This enables separation of environments for different clients, control rooms, or productions — all within the same CloudFlex account.
Starting an Instance
Section titled “Starting an Instance”To start an instance:
- Click the green play button next to the instance name.
- Confirm the action (for example, starting “creator vMix”).
- Alternatively, check multiple boxes and use the toolbar Start button to launch several instances at once.
Filtering and Sorting Instances
Section titled “Filtering and Sorting Instances”Use the filter dropdown at the top-right of the toolbar to view instances by state:
- Running – currently active instances
- Stopped – powered-off instances
- Pending / Stopping – instances in transition
This makes it easier to locate active systems or confirm which machines are safe to start.
Use the search bar to type a few characters of any instance attribute, like IP address, or name, and the list will filter live.
Connecting to the Instance
Section titled “Connecting to the Instance”Once an instance is running, you can connect to it using DCV, which is included in CloudFlex.
Choose your preferred method:
- 🌐 Web Client – launches in a new browser tab
- 💻 Native Client – opens via your installed DCV application.
Connecting to the Remote Machine
Section titled “Connecting to the Remote Machine”Connect with the Web Client
Section titled “Connect with the Web Client”- Click the screen icon on the far right of the instance row.
- A new browser tab opens, connecting you directly to your remote machine via DCV.
- You can now operate your cloud instance as if you were on-site.
Connecting to Using the DCV Client
Section titled “Connecting to Using the DCV Client”Step 1: Change Connection Type
- For a better experience and user performance, change your connection type on the toolbar to DCV.
Step 2: Download the DCV Client
Step 3: Access Your Instance
- Once in the DCV client, you will see a remote connection to your instance, similar to what you would see in a web browser.
When to use the native DCV Client
- You need Full screen on multiple monitors
- You need Overall better user experience
- You need Lower overall latency
CLOUDflex recommends using the native DCV client for best performance